Networked
In this scenario, both computers are connected to the same router/network.
Non-Networked
In this scenario, computers are not networked to the same router. They can be in two different locations as well.
Transferring Files from PC to PC
Use a USB Flash Drive OR an External Drive
This method works for both networked and non-networked, because it is simply copying the data onto a external drive, connecting it to the other PC and copying it from there. This is by far the easiest method, depending on the size of your data you can get a usb flash drive or an external drive and use it to copy the data. To check the size of your data, you will right click the folder in which you have your data and select Properties, this should tell you how big the data is, you can check sizes for all folders you wish to copy and add them up or you can move all data into a single folder to check the size. Once you know how, see the method below. Check Out USB Flash Drives Check Out External Drives
Steps To Copy Files To The USB/External Drive
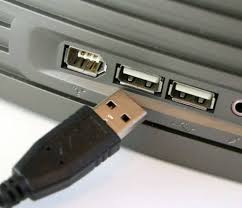
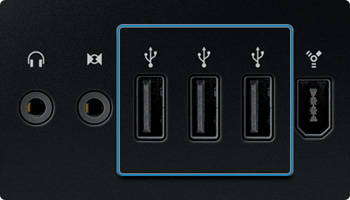
Once you have your USB/External Drive ready, you will connect it on the USB port of your computer. This is usually located on the back or front (on most desktops) and on the sides on laptops.
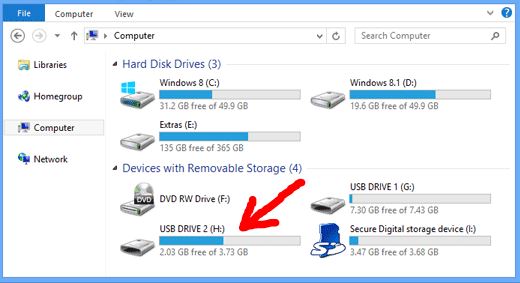
After you’ve got your external disk, you will plug it into the USB port as shown in the image above. The drive will automatically show up in your “My Computer”, if you don’t know where My Computer is, just hold the Windows key on your keyboard and press E to open up My Computer. The drive will appear under “Removable Devices”, if you are not sure which one is it, while still looking into My Computer, unplug and re-plug the drive in the USB slot and note down the drive letter. (H:) in the image below.
Next, you need to copy the data to the drive. You can right click the folder and select copy or you can right click the folder and select Send To -> “Drive Letter which you noted Earlier” – Do this for all the folders you wish to copy. I would usually copy the C:\users\username folder which contains everything and then sort it out on my other PC. Which ever folder it is, simply right click, select copy and then open computer (Windows Key + E), double click the drive, right click and select paste.
Using Windows Easy Transfer
If your OS’s are all Windows 7, then Windows easy transfer is very good for transferring user profiles with their data from one PC to the other (using a USB stick or disk as device in-between). It works really well. If it is Windows 8.x, then Easy Transfer has been greatly reduced in it’s capabilities, in that case just copying whatever you need to a USB in-between works best (method 1), or of course, if you setup the PC using the recommended m$ account, and you use the same account on the new PC, then it syncs the user profiles automatically with your m$ OneDrive account.
Here’s how to use Windows Easy Transfer:
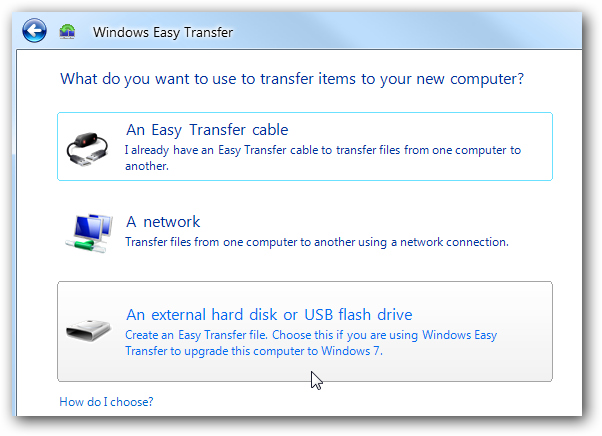
Click the Start button and type Windows Easy Transfer and choose the Windows Easy Transfer option from screen. On the welcome screen, you will be given three options
Choose “An external hard disk or USB flash drive” – you can use the other two options, the easiest option. Next choose “this is my new computer”. You will be taken to the following screen, here select “no” Now select, “I need to install it now” and make sure that your external usb/flash drive is connected. Select External hard disk or shared network folder This will copy the easy transfer file to the drive, which you now need to install on the older computer.
Configure XP/7 Transfer Process
Now on your XP/7/Vista Machine, plug the drive in and open it. You will be shown the transfer process of the program. Followed by a welcome screen, Again choose “An external hard disk or USB flash drive”. After it has finished scanning, you will be shown a list from which you will need to choose the data you wish to save/copy The advanced option will allow you to choose files/folders specifically, which is good if you wish to transfer selected files and folders. The next option will allow you to put a password, i do not recommend this because i have seen users forgetting their passwords with no access to the original PC they had backed up on. After the file has been saved, you will now connected the USB to your other computer.
Restore Your Settings
Select Yes, for “plug in your external hard disk or USB…” This will open up the back up folder. Now from here, your entire back up or the files you chose can be restored. Once the transfer is complete, you will be able to see the report of the transfer.
How to Transfer Files Securely using Serv-U Managed File Transfer ServerHow to Transfer Files from Ubuntu to Windows 10 in Dual BootHow to: Sync and Transfer Files from ChromeBook and your MobileHow to Transfer Large Files Quickly Between Two Android Devices