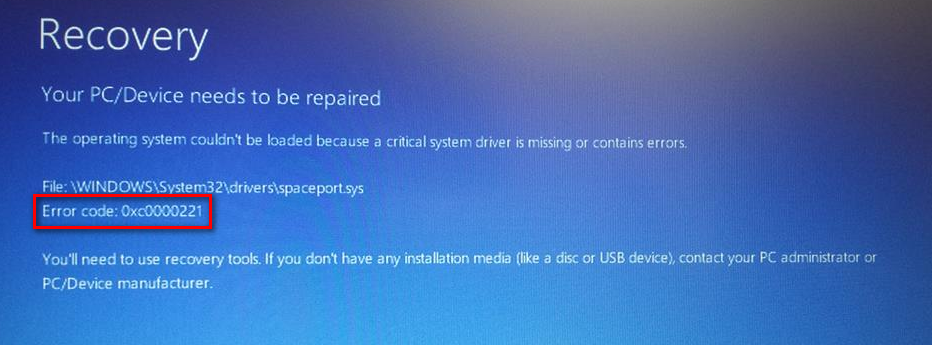
Error codes starting with ‘0x’ usually point towards a system-level corruption problem. However, with this particular error code, the error can also be hardware-related (a newly inserted RAM or insufficient power).
What is causing the 0xc0000221 error code?
After investigating the issue and looking at a lot of different symptoms of the same error, we discovered a couple of different culprits that might generate the 0xc0000221 error code:
Hardware issue created by new RAM or hard drive – There are a couple of reported cases where users started receiving this error after inserting a second RAM stick or connecting a new slave HDD.Secondary GPU – The issue is sometimes reported on computers that have an SLI or CrossFire setup.Power supply not capable of delivering enough power – This behavior might occur if your power supply is not large enough to sustain all connected devices.System file corruption – The error code points towards a system-level problem that has to do with file corruption.Third party service is interrupting startup – There are reported cases where the error was triggered by a rogue third-party service that ended up producing a BSOD crash.
How to fix the 0xc0000221 error code
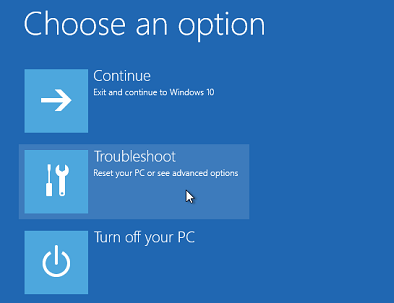
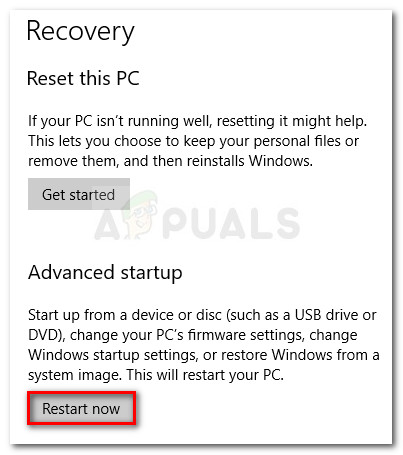
If you’re actively looking for some troubleshooting steps to help you circumvent the 0xc0000221 error code, we made it easier for you. Below you have a collection of potential fixes that other users in a similar scenario have used successfully to get the issue resolved. For the best results, follow the methods below in the presented order as they are ordered by efficiency and severity. Start with the first method and work your way down to the next until you find a fix that is effective in resolving the issue for you.
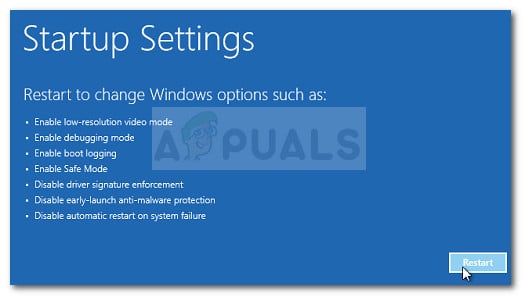
Method 1: Booting in Safe Mode
Let’s start our troubleshooting quest by making sure that the issue is not facilitated by a rogue service that is facilitating the BSOD crash. We can make sure that the issue is not caused by third-party interference by booting your system into Safe Mode. While in Safe Mode, your computer will start in a limited state with only the basic files and drivers needed for the Startup process. If your computer boots just fine into Safe Mode, we can determine that the issue is facilitated by some software you previously installed. Here’s a quick guide on booting in Safe Mode and identifying the process that is causing the BSOD crash: If you got the same BSOD crash while booting in Safe Mode, continue down with the next method below.
Method 2: Perform an SFC, CHKDSK and DISM scan
Now let’s make sure that the 0xc0000221 error code is not occurring due to a system file corruption by running a couple of built-in utilities designed to fix Windows file corruption. Several users struggling with the same issue have managed to get the issue resolved by resolving system file corruption via SFC, CHKDSK or DISM scans. This procedure might take a while, so please arm yourself with patience and don’t interrupt the process until it’s complete. Here’s a quick guide on performing SFC and DISM scans:
Method 3: Verifying RAM for issues
RAM sticks are often identified as culprits when it comes to the 0xc0000221 error code. RAM issues can be tricky to identify as even some of the best testing utilities might fail to catch all errors such as mismatched memory errors. The best and easiest strategy of verifying if your RAM modules are responsible for the error is to open up your PC and remove one of the modules (if you’re using two RAM sticks). If your computer is starting up just fine with only one RAM stick, try swapping the position of the two RAM sticks – issues sometimes occur when the faster memory is placed behind the slower memory. If you are suspecting problems with one or both your RAM modules, you can run a MemTest on them – but make sure you let it run for at least 5 hours in order to obtain a conclusive result. If you managed to clear your RAM modules from the culprit list, continue down with the next method below.
Method 4: Removing secondary GPU and external HDDs or SSDs
Other users have reported being successful in eliminating the error code 0xc0000221 by disconnecting all unnecessary devices. It’s entirely possible that this issue is occurring because your power supply doesn’t have enough power to sustain all connected devices. Let’s test whether this theory holds true by disconnecting every unnecessary device – secondary HDD, external HDD, DVD optical drive, second GPU from SLI (or CrossFire setup), non-critical peripherals. Once your PC is stripped to the bare minimum, power up your computer and see if the system manages to get past the startup screen. If your computer manages to boot up without the error code 0xc0000221, systematically re-connect the non-essential components until you manage to identify the culprit. If this method wasn’t applicable, continue down with the next method below.
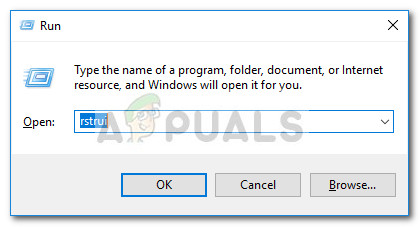
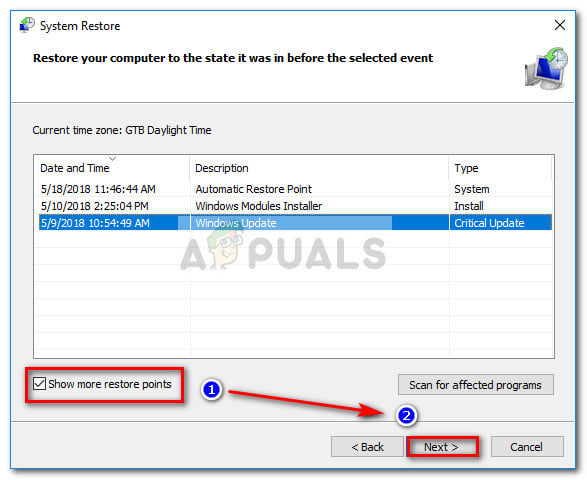
Method 5: Using a previous System Restore point
Several users have reported that this issue started occurring right after Windows Update (WU) completed the installation of a big OS Update. If a botched Windows Update is triggering random BSOD crashes with the error code 0xc0000221, you might be able to get the issue resolved by using a System Restore point. System Restore is a Windows feature that will allow you to fix a wide array of crashes by restoring your machine state to a previous point in time. With a little bit of luck, we are going to use it to restore the computer to a healthy state in which the error code 0xc0000221 was not occurring. Unless you modified the default behavior yourself, your OS should have created a System Restore point right before the update responsible for the error was applied. Here’s a quick guide on using the System Restore feature to resolve the error code 0xc0000221: If you didn’t have an appropriate System Restore point or this method wasn’t applicable, continue down with the next method below.
Method 6: Performing a repair install
If none of the methods presented above have allowed you to circumvent the 0xc0000221 error, you might have to start considering a clean install. But before you do so and lose all your personal data, there’s a better option that will allow you to preserve your personal files and applications. A repair install will replace any broken Windows components that might be triggering the error with fresh copies. But as opposed to a clean install, a repair install will not delete user personal files (such as photos, music, videos) or third party applications. If you decide to do a repair install, you can follow our step-by-step guide using this guide (here).
Fix: Startup Repair Cannot Repair this Computer AutomaticallyHow to Fix Automatic Repair couldn’t repair your PC on Windows 10How to Fix “Preparing Automatic Repair” Error on Windows?How to Repair Windows 10 Configuration Error ‘What needs your attention’?