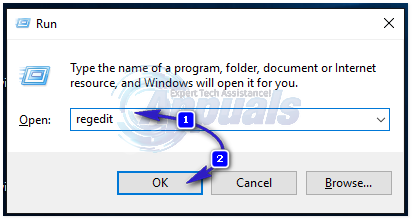
Thankfully, this problem is just as easily fixable as it is irritating. First and foremost, hop onto the official website of the manufacturer of your laptop, search for all available drivers for the specific laptop that you own and make sure that your laptop has the latest Touchpad driver available. If installing the latest Touchpad driver available for your laptop doesn’t get rid of the problem, fear not as there is another solution that has worked for almost every single Windows 10 user who has suffered from this issue in the past. This solution requires you to fiddle around with your Windows 10 computer’s registry, and that can be a risky endeavor, so make sure that you are super careful during the use of your computer’s Registry Editor. To fix this issue and prevent your laptop’s Synaptics settings from resetting every time you reboot your laptop, you need to: Press the Windows Logo key + R to open a Run. Type regedit into the Run dialog and press Enter.
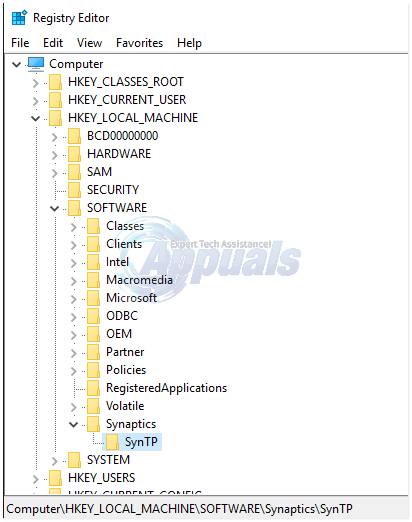
In the left pane of the Registry Editor, navigate to the following directory:
Image is for illustration only, follow the exact path Click on Install in the left pane to display its contents in the right pane. In the right pane of the Registry Editor, locate and double-click on a key named DeleteUserSettingsOnUpgrade. Replace whatever is in the Value data field of this key with 0. Click on OK. Close the Registry Editor.
Restart your computer, and your specified Synaptics settings should hold even after your computer reboots.
Synaptics Touchpad Not Working? Try these fixes!Fix: Cannot install Synaptics Touchpad Driver on Windows 10Touchpad not Working after Windows 11 Update? Try these fixesFix: Synaptics WBDI (SGX-enabled) Fingerprint Reader ‘Device Can not Start (Code…


